AUv3 & SwiftUI: Embed Audio Unit Extensions in a Multiplatform App
SwiftUI makes it easy to build multiplatform apps using a single codebase. However, the current Xcode templates for application extensions only support one target platform, meaning that you have to create separate extensions for each platform when developing a multiplatform app. This can result in unnecessary duplication of code, especially when bundling audio unit extensions, since AUv3 supports both macOS and iOS.
Let us start by creating a new multiplatform project in Xcode:
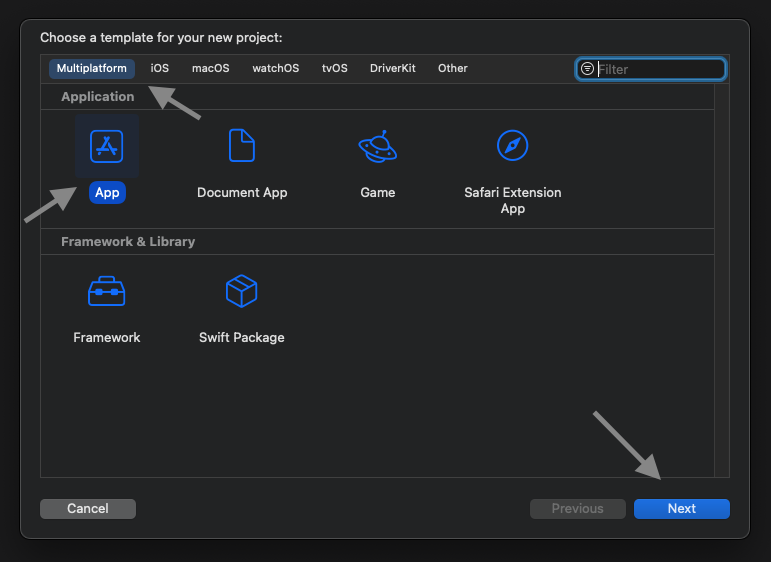 Create a new Xcode project, then select Multiplatform, App and click Next.
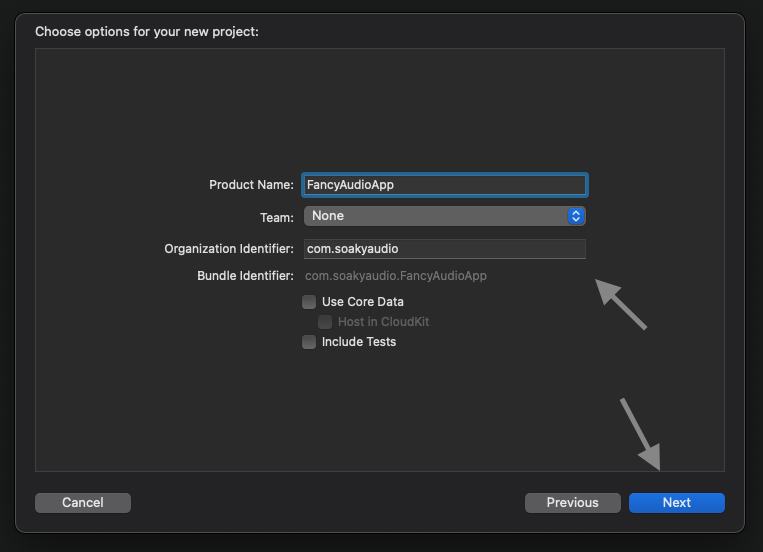 Fill the metadata, click Next, then select a path and hit Create.
Try to run your newly created project on macOS and iOS to verify your build is working. Then proceed with adding an app extension by selecting the root project and pressing the small + icon at the bottom of the left Targets sidebar:
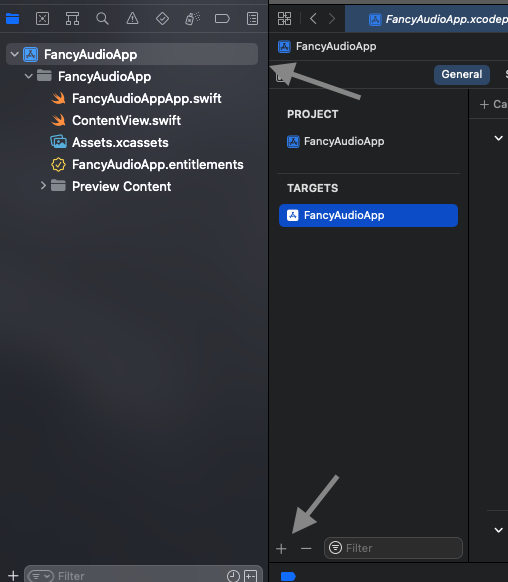 Select root project and press + icon in the Targets sidebar.
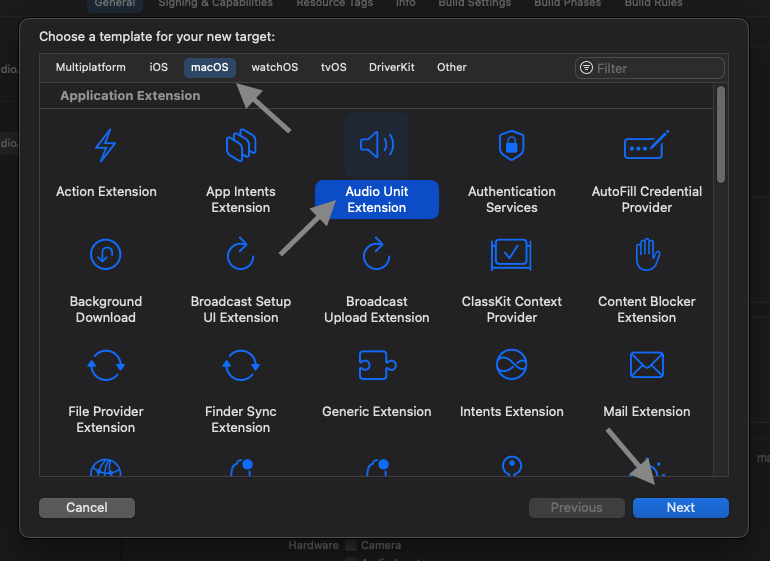 Choose macOS, Audio Unit Extension and press Next.
While it is also possible to start from an iOS extension template, it takes slightly more effort to fix up the UI part on macOS targets (aka copying the missing files from the macOS template). That obviously only matters if your audio unit comes with its own user interface.
In the next dialog, you will need to set the metadata for the audio unit. Xcode will generate a different template based on the audio unit type and whether a UI should be included. It is best to examine the various options and select the most suitable one, as adjusting the templates later and understanding the internals of AUv3 can be quite time-consuming.
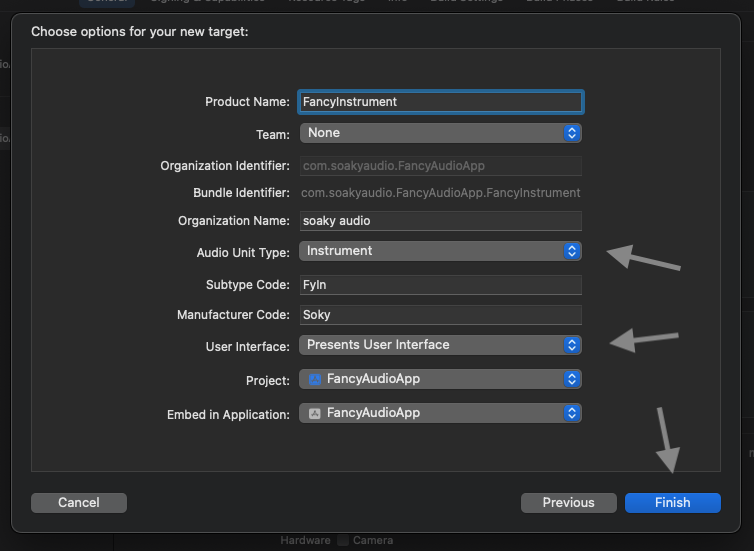 Fill the metadata, in particular Audio Unit Type and User Interface, then click Finish.
After Xcode generated the template code, let us see the macOS audio unit in action. Activate the scheme of the extension (FancyInstrument), set the target platform (My Mac) and click Run. You will be asked for a host app to run the audio unit - any app that supports AUv3 plugins will do, e.g. Logic Pro X, GarageBand or AU Lab (bundled with Additional Tools for Xcode).
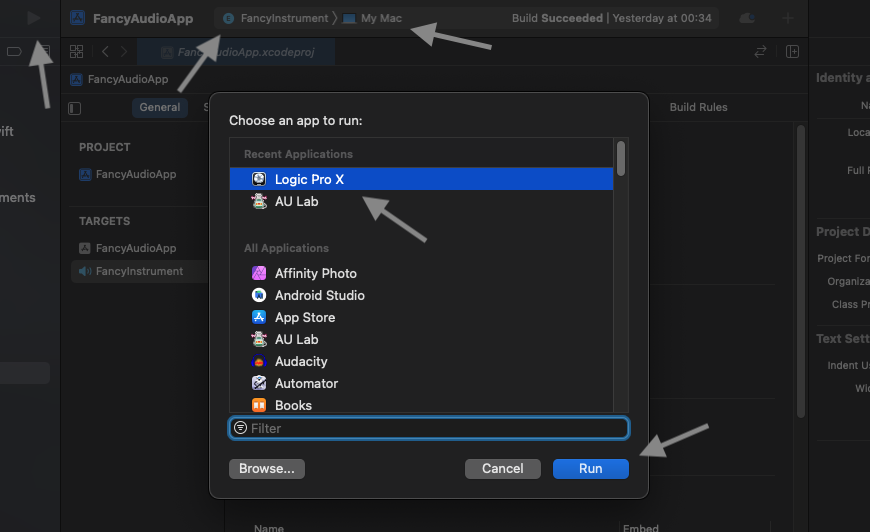 Select the extension scheme, the target platform and click Run. Then choose an app to run the unit and confirm with Run.
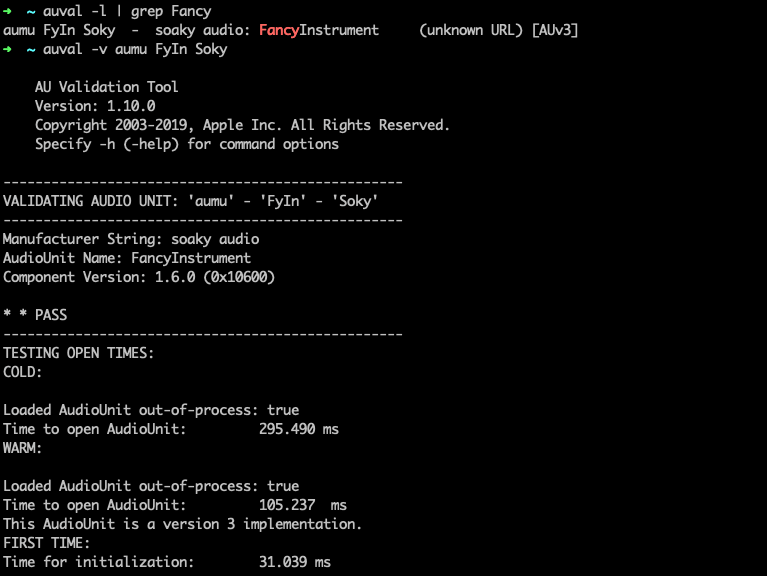
You should be able to use your audio unit like any other plugin. While the host application is running, you can also validate the unit via the auval tool.
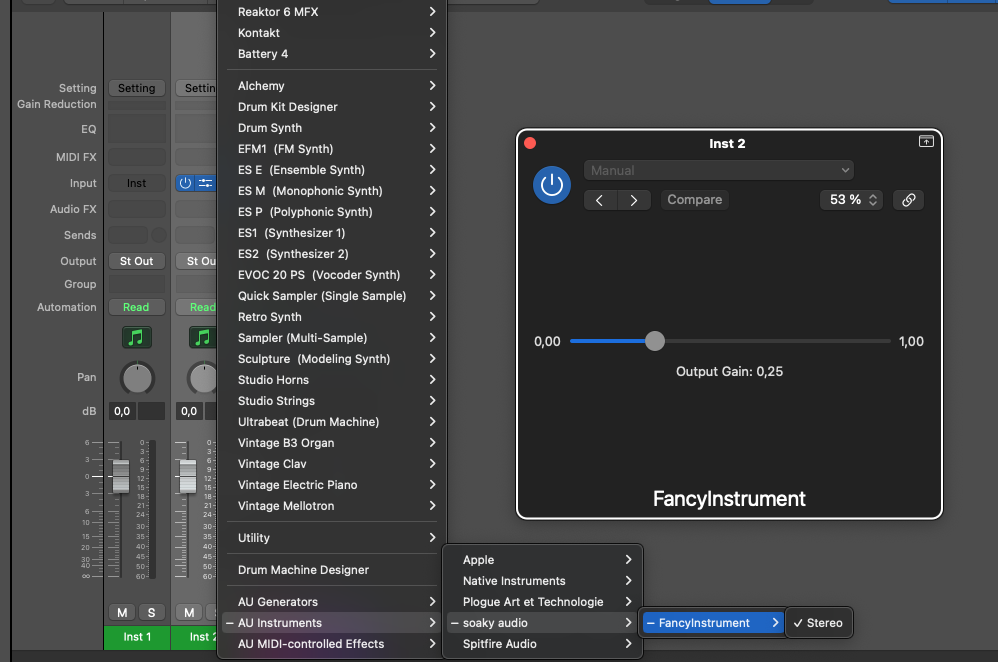 Logic Pro X lists instrument audio units (remember the Audio Unit Type) under AU Instruments, whereas effects are found in Audio FX -> Audio Units.
 Use
Use auval to validate the audio unit.
Close the host application and head back to Xcode. If you try to run the same scheme on an iOS target, you will be greeted by a "run destination not valid" error message. Let us fix that in the build settings:
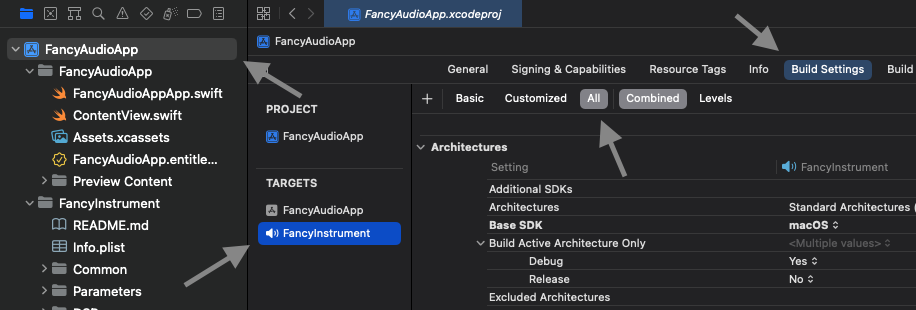 Select root project and extension target, then Build Settings and verify All is selected.
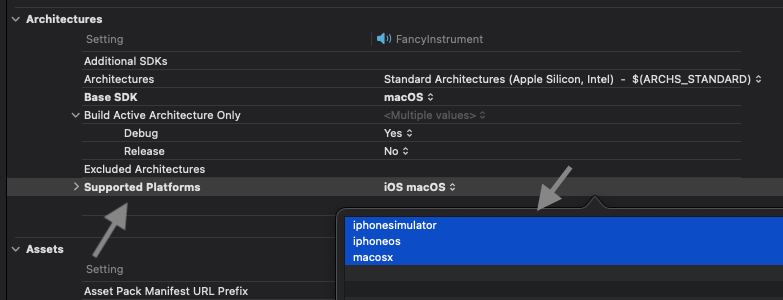 Under Architectures -> Supported Platforms, choose Other... and add the iphonesimulator and iphoneos platform strings.
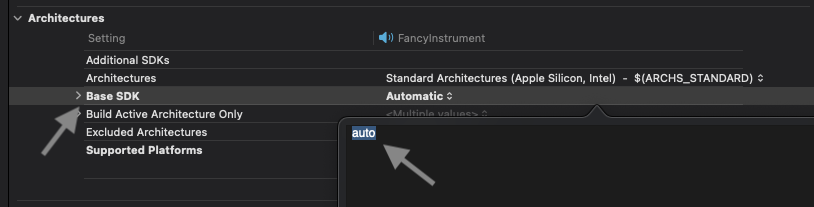 Under Architectures -> Base SDK, choose Other... and enter auto.
Since the macOS view controller xib file does not support iOS targets, you have to exclude it from the Copy Bundle Resources build step:
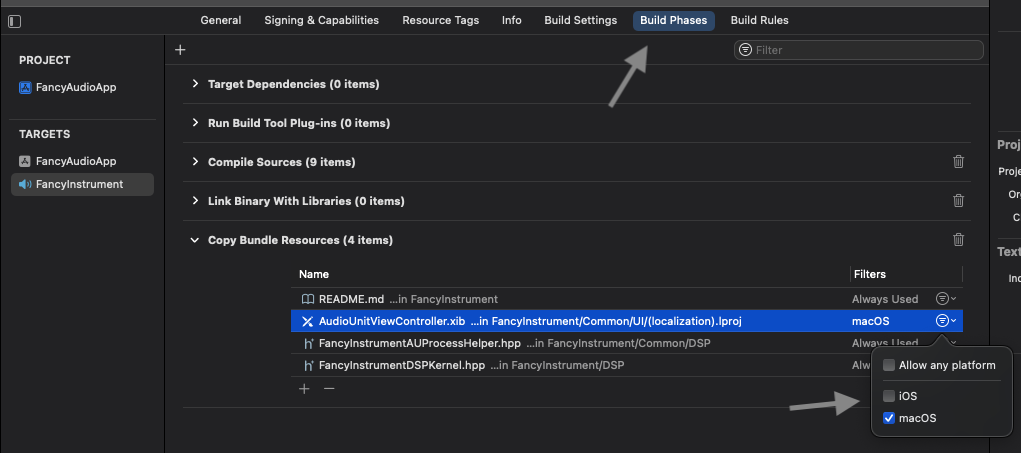 Under Build Phases -> Copy Bundle Resources, locate the view controller
 xib file, select Filters and activate macOS only.
Side note: If you examined the audio unit extension template for iOS, you would see that it includes a storyboard in place of the
xibfile. In my testing, the storyboard was not necessary to get the UI working on iOS - in fact, no matter what I changed, the changes were not reflected in the final audio unit. I might get something wrong here, so please do not hesitate to reach out if you have better insight into this.
Completing these steps lets you build the extension for iOS, but the install step fails due to a provisioning profile error. This is caused by sandbox settings that are necessary on macOS but do not apply to iOS. Luckily, Xcode allows conditional settings based on the SDK which can reconcile both worlds:
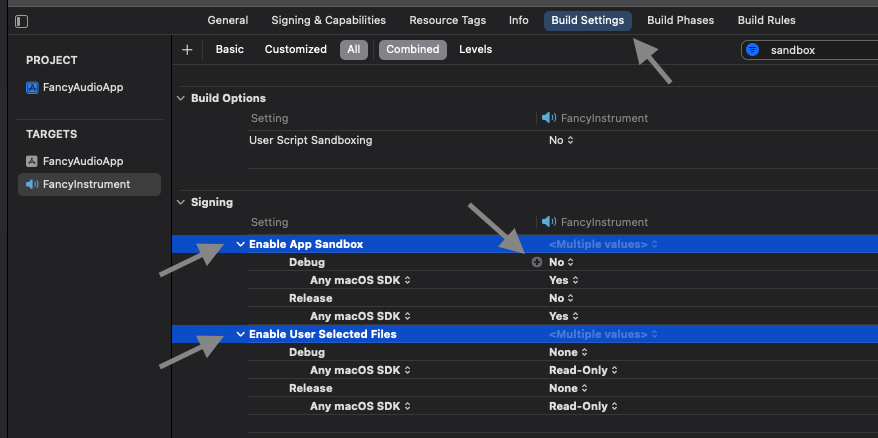 Back under Build Settings, search for the Signing section. Add conditional settings by pressing the small + icon.
The Enable App Sandbox setting should be No by default and Yes for Any macOS SDK. The Enable User Selected Files setting should be None by default and Read-Only for Any macOS SDK. Getting these settings wrong will cause your audio unit not showing up on macOS.
Try to run the extension scheme on an iOS target now. To use AUv3 plugins on your iOS device, you will need a compatible host application, such as GarageBand:
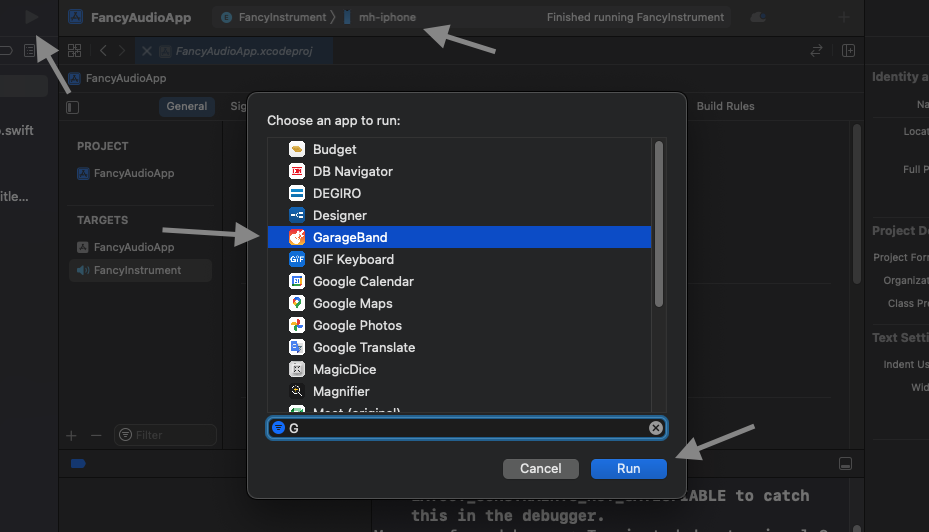 Select the extension scheme, an iOS target and click Run. Then choose an app to run the unit and confirm with Run.
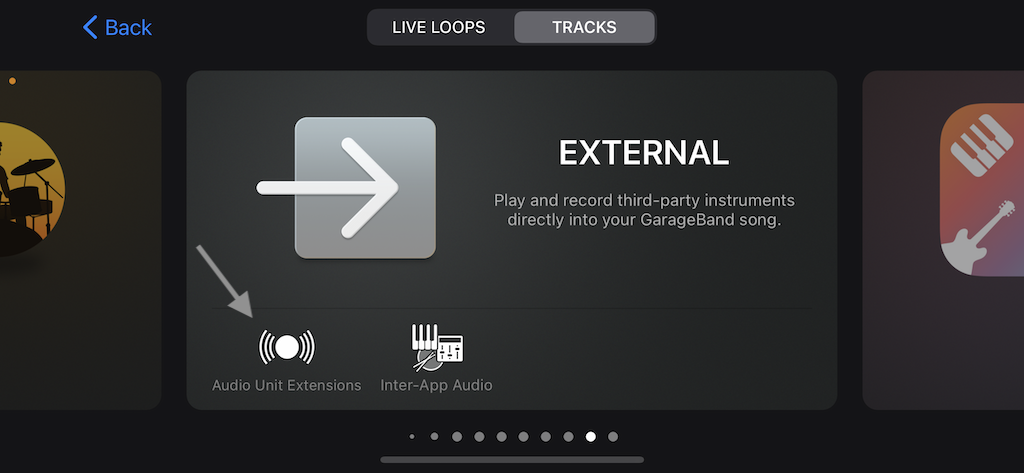 In GarageBand, add a new external track, selecting Audio Unit Extensions.
If you cannot see the audio unit in the host app, try running the app scheme (FancyAudioApp) first to install the main app. Then switch back to the extension scheme, run it and proceed from there.
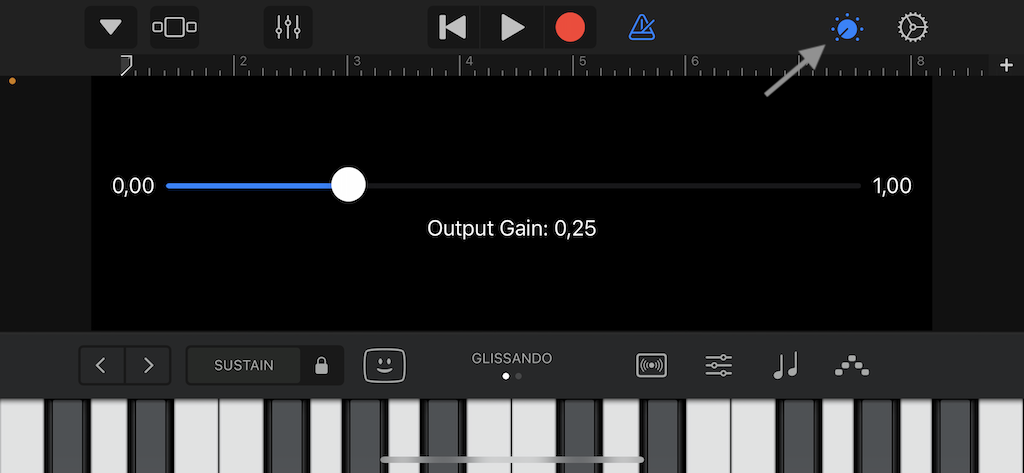 To open the user interface, tap the controls button on the top.
If everything works up to this point, do a sanity check on macOS by switching back to a macOS target platform and rerunning the extension scheme. Your audio unit should still show up in the host app and the user interface should be working too.
That is it, you have successfully created a multiplatform app with an audio unit extension, all using a single codebase. I uploaded the final project to GitHub as a reference.
If you have any additional questions or would like to provide feedback, please contact me via email. You can also find discussion about this post on the relevant Hacker News thread. If you enjoy my content and would like to support me, feel free to purchase one of my apps.